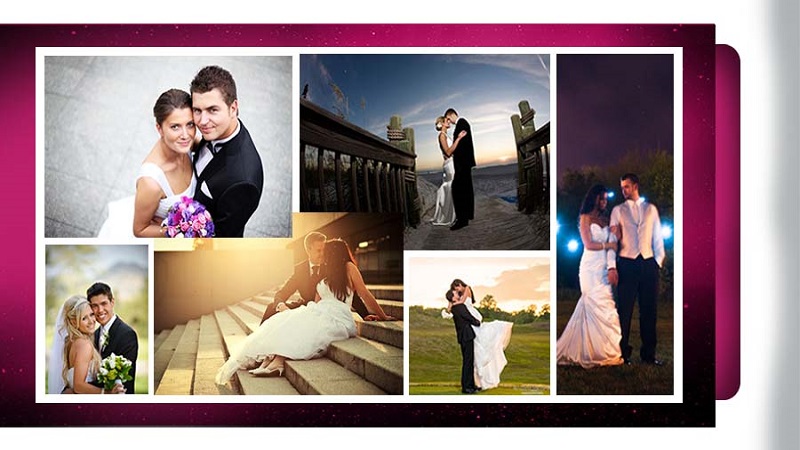
Wedding Photo Editing Tips For Newbie Photographers
You maybe concerned about weeding photo editing tips. As you most likely know, altering photos is one of the errands that accompany the work of a wedding photographer. Seeing how to change wedding photos, realizing all Photoshop brushes or devices can be a tedious and overpowering piece of your wedding photography work process. Advantage from the accompanying 20 wedding photo altering tips will change your picture correcting and make it quick and straightforward.
Table of Contents
Wedding Photo Editing Tips In Below Step By Step

1.Choose a Wedding Photo Editing Software
For altering wedding photos (editing, shading revision), use Adobe Lightroom CC for wedding photo correcting/photo manipulations (skin modifying, stray hair removal, body reshaping, background improvement, adding impacts), use Adobe Photoshop CC. Get the Creative Cloud Photography plan beginning at just US$9.99/mo. (all-new Lightroom CC, 20 GB of distributed storage, Lightroom Classic CC, and Photoshop CC).
2.Make Your Photo Culling Fast
In the first place, select the photos you need to alter. It’s energetically prescribed to utilize the Flag instrument. While picking an image, you click on the P on the console (P for Pick). So you add a banner, or you can tap on the checkbox in the thumbnail image. Likewise, you can utilize the Face acknowledgment feature in Lightroom to sort wedding photos into Family, Friends, Macro, Ceremony, Party, Bride, Groom, Couple, and Lifestyle.
Having a great many wedding photos, you won’t correct every one of them in Photoshop – it will require around one year to finish. To make an essential skin modifying (eliminate skin break out, pigmentations, scars, and different deformities) and eliminate small items from the background, utilize a Healing Brush apparatus in Lightroom. Note; bookmark this page about wedding photo editing tips to remind yourself next time.
3.Download or Create LR Presets/PS activities
It is outstanding amongst other ways for quick shading remedy in Lightroom and Photoshop. There are many paid and free Lightroom Presets weddings and free Photoshop activities weddings on the web. Use them to add a rich pastel, light-dark, and white, or stylish matte impact to your wedding pictures. All modules are adaptable and suit all Lightroom/Photoshop forms. If you don’t care for some tone/colors/shadows indicators, you can transform them. It gets a particular style of images that you can follow on all the photos.
4.Correct Contrast Settings
Fixing contrast is just about as significant as changing the white equilibrium in your wedding shots. Making the ideal equilibrium of features and shadows can be long and drawn out to amateurs in Photoshop. Lightroom will make photo altering exceptionally simple via automating the activities of shading rectification. Disregard pulling sliders over everyone.
Assuming you need to change the lighting, first make the light on the photo impartial. Go to Select – Color Range and select Highlights. Duplicate the chosen region to the new layer of the CTRL + J order. Note; bookmark this page about wedding photo editing tips to remind yourself next time.
Get back to the background layer and through the Color Range, select the Shadows. Duplicate the choice on a separate layer (CTRL + J) and change the mixing method of the layers with the shadows to Multiply.
Decrease the mistiness to about 30%, contingent upon the image. Kindly create another layer, fill it with a nonpartisan dark tone and change the mixing mode to Overlay. We begin to address the light/shadow with the instruments Dodge and Burn (O). Or on the other hand, you can create another layer, change its mixing mode to Soft Light or Overlay and draw with high contrast tones in the necessary regions with a low haziness brush.
5.Prepare Shortcuts for Making Wedding Photography Workflow Fast
Accessible routes influence the speed and nature of your work that matters while altering wedding photos. Utilize these Photoshop consoles in alternate ways that altogether accelerate your image modifying. Note; bookmark this page about wedding photo editing tips to remind yourself next time.
6.Use a Dehaze apparatus
It isn’t easy to think about what the weather will resemble during the wedding photoshoot. In any case, on account of the Dehaze device, you can change the cloudiness and eliminate desserts with lighting. This capacity adds full tones and creates clear lines of all items in the image. Note; bookmark this page about wedding photo editing tips to remind yourself next time.
7.Make a Quick Noise Retouching
Short wedding photography altering procedures incorporate a diminishing commotion apparatus. Advanced clamor is the consequence of helpless lighting or a crummy focal point. First, change the shading commotion on the off chance that the light is contorted and grains are excessively noticeable, change the luminance clamor. Like this, first, save pictures in RAW structure.
8.Apply a Blurring Effect to Portraits
This impact is utilized while choosing a thing on the image or eliminating the center from undesirable items. The capacity is additionally reasonable for photos without center equilibrium. You can handle the measure of obscure, contingent upon the reason for utilizing this capacity. Set the sharpness to – 100 for obscured backgrounds and – 50 for creating a marginally obscured backdrop.
9.Make Photos Black and White
For making a dramatic look or underscore the inclination displayed in the photo – make photos monochrome. Such a change will work on the nature of the picture, particularly in case it is made in helpless light. In Lightroom, to accelerate the cycle, create a preset and use it for a few images on the double. In Photoshop, go to Layer > New Adjustment Layer > Black and White.
10.Make a Hollywood Smile
Eliminate yellow shades yet keep a natural look. To brighten teeth rapidly, you can apply the cover capacity to the whole image. Kindly don’t utilize it except if there is a good line of teeth. For this situation, select the correct brush estimate and alter the appearance physically. Note; bookmark this page about wedding photo editing tips to remind yourself next time.
11.Batch Image Editing
Following a challenging day of the wedding photoshoot, you get back home to alter many photographs, which can last hours from your wedding photography work process. Presently consider weddings you shoot during the year. Changing each wedding photo sounds insane, isn’t that right? Batch altering will assist with diminishing time spent on it. The brain that re-appropriating altering to wedding photo altering services, such as Wedding-correcting, won’t just save your time generally; however, keep one photographic style.
12.Make Cropping
Before trimming wedding images in Lightroom, mind the Rule of Thirds, level a photo, faint the screen to have a reasonable perspective on how the wedding pictures will look whenever it’s edited. You can zoom out to see how the image will look like on a more limited size. Note; bookmark this page about wedding photo editing tips to remind yourself next time.
13.Correct Lighting
At times open-air pictures are made immaculately and nearly needn’t bother with photo modifying. However, they come up short on the delicacy and sentiment tones. Attempt to apply different impacts, for instance, Cross Process 2, or utilize the capacity Beautify. Make two developments, and photo altering will be finished.
14.Use the Clone Stamp Set
On the off chance that your wedding representations have minor face imperfections, apply the Spot Removal device in LR or the Clone Stamp/Healing Brush in PS. Utilizing them, you can eliminate little articles, make stray hair imperceptible, smooth minor skin flaws, eliminate diverting background spots, fix clothing wrinkles or residue.
15.Use Frequency Separation for Smoothing Skin
This fast-altering strategy you can utilize for the face and attire, sky, and background. It is a multifunctional instrument for work. Note; bookmark this page about wedding photo editing tips to remind yourself next time.
Clipping path benefits at Clipping Path Specialist

Since most disseminating programming oversees everything far eliminated from cutting, this is significant for visual organizers. It is because it works for them. They can throw photographs of your thing into another image without dealing with a white background. Starting from here of view, it permits the substance to conflict with the main thing.
Take a look at Clipping path service specialists services:
- Clipping path
- Clipping path service
- Background removal
- Image masking
- Drop shadow
- Ghost mannequin
I need to say that this is in opposition to the limitations of your rectangular image. If you expect to keep some print material, the segment way is generously more fundamental. It remembers photographs of your things for a magazine and rundown. In like manner, a picture alone results from various courses in the photograph business for different things with colors. Note; bookmark this page about wedding photo editing tips to remind yourself next time.
Read More: 10 Best Mobile Photo Editing Apps For Photographers